Hire cart - {{ cart.TotalQuantity }} item{{ (cart.TotalQuantity != 1 ? 's' : '') }}
Cart is empty. Add gear you want to your hire cart and review them here.
There are no branches matching your search.
Login to view or create favourites and other benefits.
Register to start speeding up your hire process and keep track of your hire history.
Nice to see you again. We've made a few changes since you were last here.
Pick a colour
Favourites ({{ userFavourites.length }})
Add your frequently hired items to easily view and hire them again.
Keep your contact information with us up to date so you get the latest and best rates with us.
Hire cart - {{ cart.TotalQuantity }} item{{ (cart.TotalQuantity != 1 ? 's' : '') }}
Cart is empty. Add gear you want to your hire cart and review them here.

If you are keen to grow a healthy lawn but have no idea where to start, let this guide be your starting point. Laying a lawn from seed is a great choice for those who take pride in their backyard and love nothing more than the feel of fresh grass underneath their feet. There are many advantages of choosing to plant lawn seed over turf or ready-made lawn. If you want to see stellar results, it is important that you have the right landscaping tools for the job. At Hirepool, we have a wide range of equipment for hire that can help make your garden ideas a reality.
Low Stock Call First
High Demand Product: We suggest making a booking for this item in advance.
Low Stock Call First
High Demand Product: We suggest making a booking for this item in advance.
Low Stock Call First
High Demand Product: We suggest making a booking for this item in advance.
Low Stock Call First
High Demand Product: We suggest making a booking for this item in advance.
Low Stock Call First
High Demand Product: We suggest making a booking for this item in advance.
Low Stock Call First
High Demand Product: We suggest making a booking for this item in advance.
Once you are fully equipped with the required garden tools, you can make a start on the step-by-step process required to grow a lawn from seed. If you don’t know what you are doing, you are at risk of creating an unsightly mess that could be an eyesore for both you and your neighbours. Read on to find out why sowing grass seed could be perfect for your lawn and garden area and learn how to do it like a pro.
We’ve got you covered for backyard DIY at Hirepool, with helpful, well-serviced gear available for hire. Laying a lawn from seed isn’t something that you’ll need to do on a regular basis, so it isn’t very cost-effective to purchase a specialised kit outright. Hiring equipment like a dethatcher or fertiliser spreader can help you save money and time, as it is cheaper than buying outright, plus you won’t have to worry about maintenance. Not to mention, it can also save you some valuable space in your garden shed.
Our range of garden and lawn equipment is regularly serviced, so you know you are hiring equipment you can rely on to get the job done well. Simply view our range online, make a booking and then head to your local branch to pick up your gear. If you’ve got a lot of gear on your list, you can also hire a trailer to cart it around.
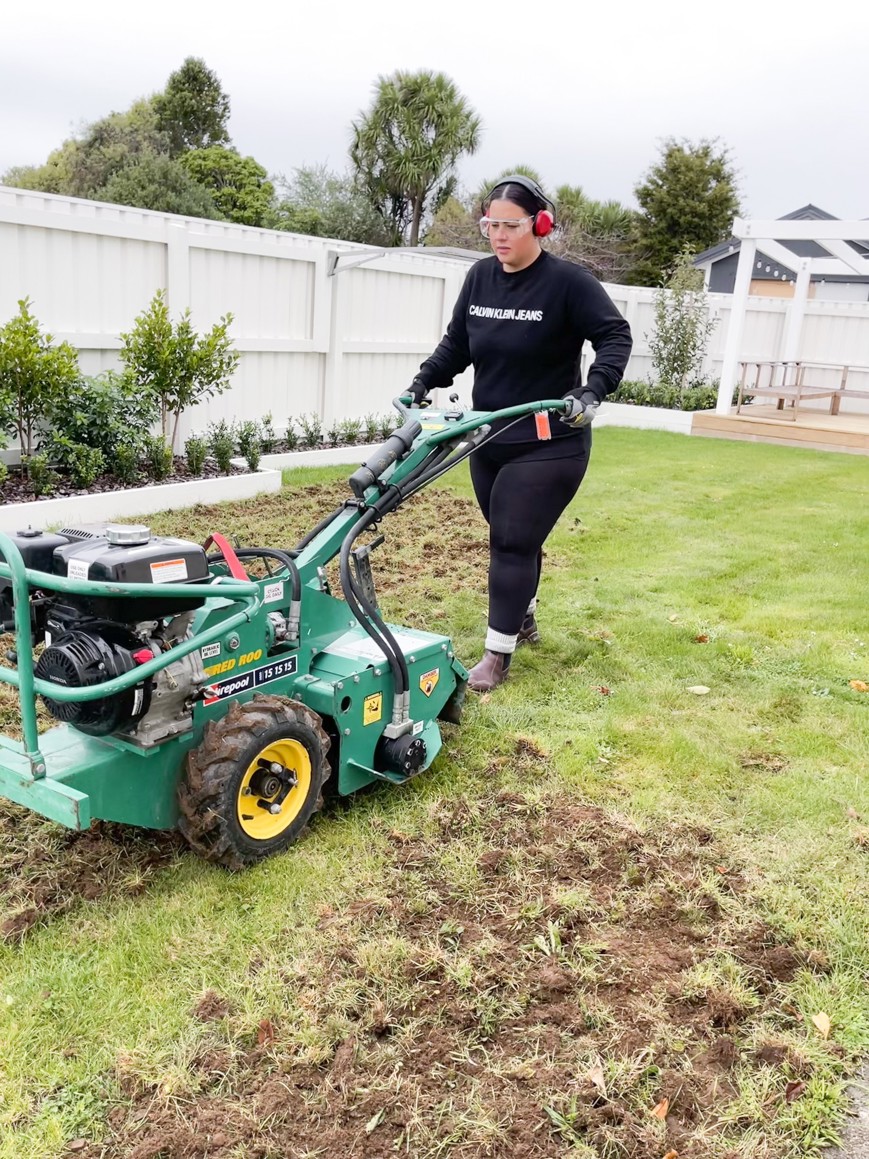
There are many reasons why it’s better to start your lawn from scratch using seed rather than ready-made turf. Not only can it produce great results, but it is also a less expensive option that offers more grass varieties to choose from.
Kiwi’s love DIY and often get great satisfaction from a job well done. If you love nothing more than a good gardening project, you’ll really enjoy sowing your lawn from seed. During the warmer months, your lawn becomes a place where family and friends can enjoy the sunshine and spend quality time together. Nurturing your lawn from scratch will make this quality time extra special.

In most cases, buying grass seed is cheaper than purchasing ready-made turf. This is especially true for large backyards, as sprinkling seed is a more cost-effective way to cover larger surface areas. By tackling this task on your own, you can also save money on labour costs. Overall, planting your own grass seed is a great way to stay on budget when landscaping your garden.
Believe it or not, there are many different types of grass and grass seed to choose from. This array of choices allows you to pick the right grass for your unique outdoor space and location. This means you can make an educated decision on which grass best suits the current climate and your lifestyle. Don’t get us wrong, there are still different choices available when opting for pre-made turf - just less overall.
When deciding on grass seed, one of the main factors to consider is the New Zealand climate. In Aotearoa, the best time to start a lawn from seed is generally in spring (August-November) and autumn (March-May). The weather conditions will differ slightly depending on where in New Zealand you live, so try and take this into account when choosing grass seed.
Some seeds will thrive in direct sunlight, whilst others will do better in the shade. Others do well in damp conditions and some will grow best in drier conditions. Keep this knowledge front of mind when choosing your grass seed so you can get your growth off to a good start.
You’ll also discover a wide variety of grass types with different colours and textures. In New Zealand, some of the most popular choices include tall fescue, fine fescue, kikuyu grass, couch grass, mixed blend and rye grass. When choosing your grass seed, you should also take into account how much maintenance you are willing to put into your lawn and whether you have kids or pets that will be playing on it regularly.
For instance, if backyard cricket is a tradition in your household, you might want to go for a tough and hardy type of grass like couch grass. If you live in a typically sunny area of the country, you’ll find that kikuyu grass will thrive. It is a pretty hardy choice that is great for families and highly trafficked yards. Tall fescue is another durable option, which is commonly found in Auckland and does well with little watering and can handle humid conditions.
If your backyard is looking a little worse for wear, you may need to consider starting from scratch. Before planting seed, you’ll have to prepare your lawn area so that it is in a suitable state for grass to grow. For jobs that require a lot of foundational work, you may need some larger equipment to get the job done efficiently.
If your ground is extremely bumpy and uneven, your first port of call will be to fix up your uneven lawn. To do this, we recommend using a mini skid steer loader, as it will be an efficient tool for big jobs.
When laying your soil, you’ll want to try and slope it away from your house so that water won’t pool and damage your construction. Once you’ve figured out the appropriate slope, you can then begin removing topsoil from the problem areas. You could consider using a mini excavator to get this done quicker. If you are having issues with erosion, putting a retaining wall in place will help hold back the ground behind it.
Once you’ve got your ground levelled out and your soil laid correctly, you’ll be able to actually start sowing your lawn from seed.
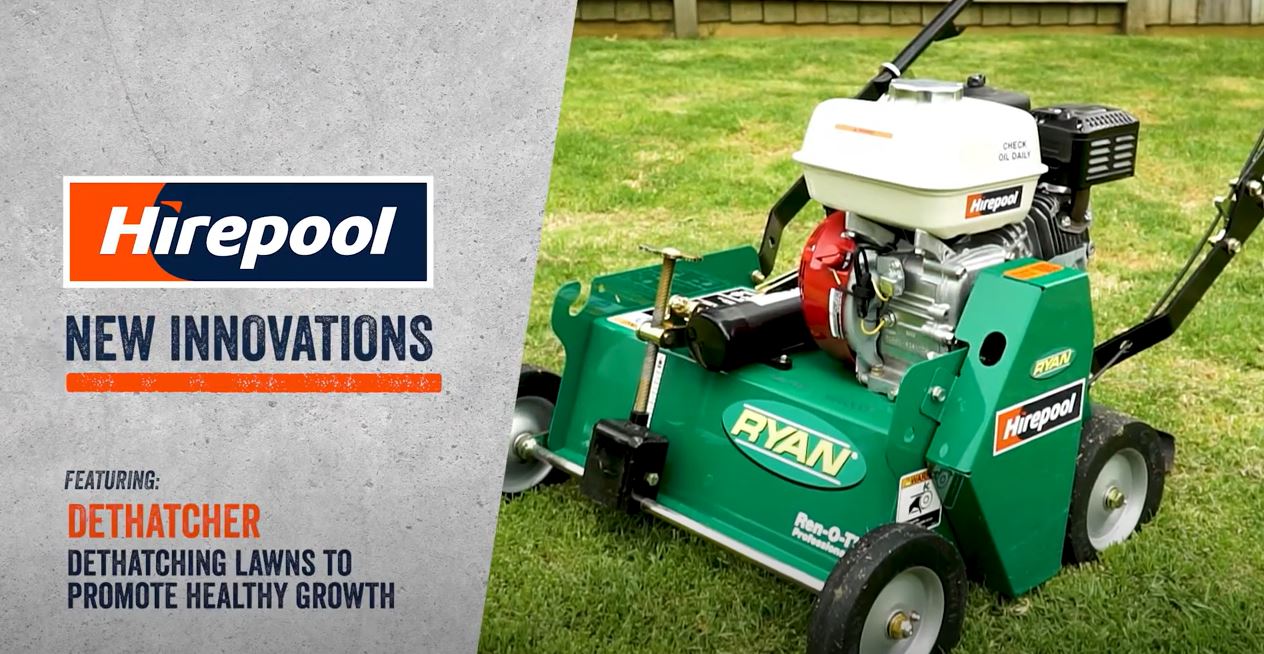
Set your soil up for success by using a dethatcher. A dethatcher is a piece of equipment with rotating blades, designed to remove excess thatch. The excess thatch is essentially living or dead plant matter like grass or plants. When your lawn has excess thatch, it can make it difficult for the right amount of water and sunlight to reach the soil. As a result, dethatching your lawn removes this organic matter and will help promote the optimal growth of your new grass.
Before using, make sure you have all the necessary safety equipment including earmuffs, covered shoes, safety glasses and gloves. Once you are geared up, you can start up the dethatcher and push it in a forward motion across your lawn. For a more detailed explanation, either read the included instruction manual or watch our video below.
Once you’ve finished dethatching your lawn, we recommend running a lawn mower over this area. Set your lawn mower on a higher setting than you would normally use to cut your lawn to clear the thatch.
Check out: https://www.youtube.com/watch?v=7bA-Vky6p-I&t=47s&ab_channel=Hirepool
A good lawn needs a solid foundation for your seeds to flourish. Get this underway by testing your soil to ensure it has the correct pH level. When testing pH levels, you can either use a home testing kit or an electric pH meter. Generally, if the pH of your soil is between 6.5 and 7.0, you are in the clear. However, anything higher might result in grass that is unable to absorb nutrients. Look into your desired grass type, as some grass (like fine fescue) may thrive with a slightly different pH level.
If you have particularly compact or rough soil, a rotary hoe might come in handy. A rotary hoe can be used to break up the soil and allow seedlings to break through when the time comes. It also helps to aerate the soil, allowing air, water and nutrients to reach the soil and promote grass growth. This allows your grass roots to grow deeper into the soil, creating a durable, healthy lawn.
If you are still left with some large weeds after using the rotary hoe, you can get stuck in with a shovel to pull them out from the roots. Another way to get rid of weeds is by spraying a pesticide using a sprayer backpack. If you choose to use pesticides, you’ll want to wait a few days before going to the next step.

Now that your soil is loose and there is no thatch, you’ll want to add any nutrients that may have been missing from your soil test. If the pH of your soil is too high, you can lower this by adding mulch, compost or garden clippings. This will prevent poor grass growth and chalky-looking soil. If your pH level is too low, you may experience an excess of weeds, as well as hindered grass growth due to lack of nutrient absorption. One of the best ways to counteract this is by using limestone.
At this stage, it is a good idea to research your chosen grass type, as different grass varieties may have different soil needs. For example, finer grasses like fine fescue prefer a slightly more acidic environment, whilst other types will prefer a pH closer to neutral.
Once you’ve figured out the best fertiliser for the job, it is time to get it on your lawn. To disperse this fertiliser, we recommend using a fertiliser spreader. This ensures that it will be spread out evenly across your lawn for optimal, non-patchy growth.
You’ll want your new lawn to be as even as possible so that it looks great and grows evenly. If you have any dips in your lawn, it pays to level this out with topsoil. You should then be able to level it all out with a shovel and a rake.
It is now time to sow your seed. Using a lawn spreader, evenly distribute your seed of choice. It is a good idea to sow the seed from east to west and then north to south for an even spread. We highly recommend using a lawn spreader for efficiency on large jobs. Not only that, but it will ensure your resulting lawn isn’t patchy, which is a very convincing reason to opt for a lawn spreader over sowing by hand.
Next, use a lawn roller to ensure the seeds are in contact with the soil so that they germinate. With grass seed, germination is essentially the grass seed sprouting into a spore. Lawn rolling also presses seeds into the soil and prevents them from getting blown or washed away during bad weather. A roller is essential for making the soil firmer and nicely structured for grass to grow evenly later on.
As with all seeds, grass seed requires water to grow. The trick is, don’t water them excessively. If you over-water them, you risk damaging the soil and washing the seed away. During this new seed period, you’ll want to keep the soil consistently moist until the seeds germinate and begin to grow.
And there you have it! A successfully sowed lawn. If you want to keep your lawn looking great, it pays to keep up with some simple outdoor maintenance. Keep your lawn protected from animals by taking a few preventative measures. Birds are notorious for digging up lawns during their hunt for a bug-filled breakfast. Stringing some lines across your lawn and fastening some shiny or reflective material can help to deter birds. If you have dogs or cats, you’ll also be aware of the struggle to prevent them from urinating on the lawn. This can kill the grass and ruin all your hard work, so it pays to get some animal repellent to avoid this happening in future, and make a plan to toilet them in other areas until your lawn is grown and lush.
Another factor that can damage your lawn is bad weather. In some cases bad weather is unavoidable, but adding more soil will add an extra layer of protection. It is recommended to use some fertiliser before the harsh chill of winter hits, as this will ensure that your lawn gets the nutrients it needs.
Once you’ve sown your grass seed, you may be wondering - how long does it take for grass seed to germinate? Generally, grass seeds can take around 10 - 14 days to germinate. In saying that, this timeframe will differ depending on a number of factors such as weather, time of year and grass species. Make sure to water according to the seed instructions and you’ll have a lush full lawn in no time.
Give your lawn the transformation it deserves and sow some grass seed. You’ll be glad you did - as laying a lawn from seed has so many benefits. It pays to do some research on types of grass seed before starting the process, to ensure you are planting the right grass for the climate. Once you’ve figured that out, you can start actually laying your new lawn. Follow our step-by-step process in this guide to ensure you get the best results!
Ready to make a start? Read up on all our best tips and tricks in our lawn and garden guides. Hire all the landscaping equipment you need from Hirepool to get the job done and get it done well.